Hey I’m Sam and I do design! I recently made a YouTube video demonstrating how to Render Realistically Really Rapidly! This process helps break down your 3D models and turn them into photorealistic renders. Below are a few tips that should help you get some eye-poppingly real Keyshot renders.
I recently attended a talk at Develop3D Live by Luxion Chief Scientist Henrik Wann Jensen and was amazed by how detailed the algorithms behind Keyshot are. He showed sample renders of the Ford Interceptor renderings used as adverts in car magazines, as well as various glasses of milk that, by inputting the chemical compounds of each into the Keyshot algorithm, could even distinguish between skimmed, semi-skimmed, and full-fat!
WANT GREAT RENDERS? THINK LIKE A PHOTOGRAPHER
If realism is what you’re looking for, it’s important to understand what you’re trying to replicate. Keyshot’s algorithms can do a lot behind the scenes, but making realistic renders means understanding photography theory, and knowing what to look for when it comes to image styles.
There are three golden rules that make up a good photograph:
• Subject matter: what is the thing you’re capturing?
• Composition: what is the right angle and the framing?
• Lighting: How is the scene lit?
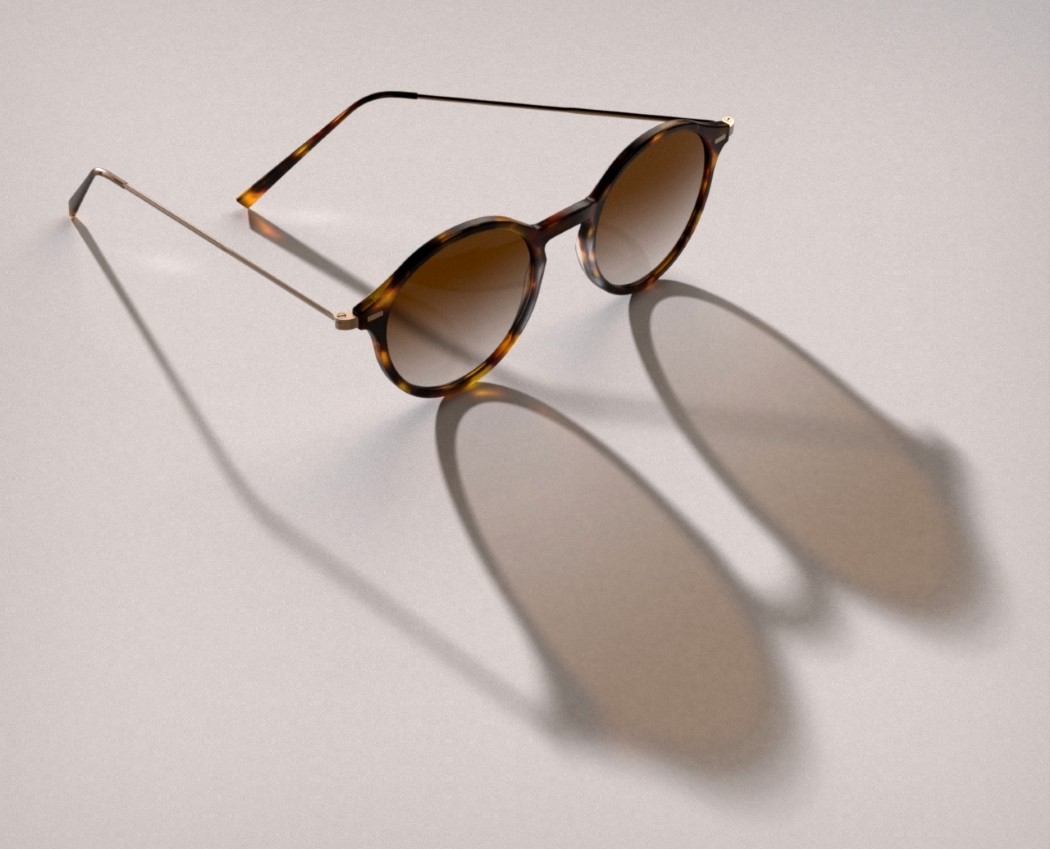
The same principles apply to renders. In Keyshot, the first thing I do is import the data I want to render, and start laying things out to get the composition right. Camera settings also contribute to the composition: as a rule of thumb, I usually stick between 50mm and 80mm lenses. These are typically what photographers use for portrait and product photography, as it replicates what our eyes naturally see.
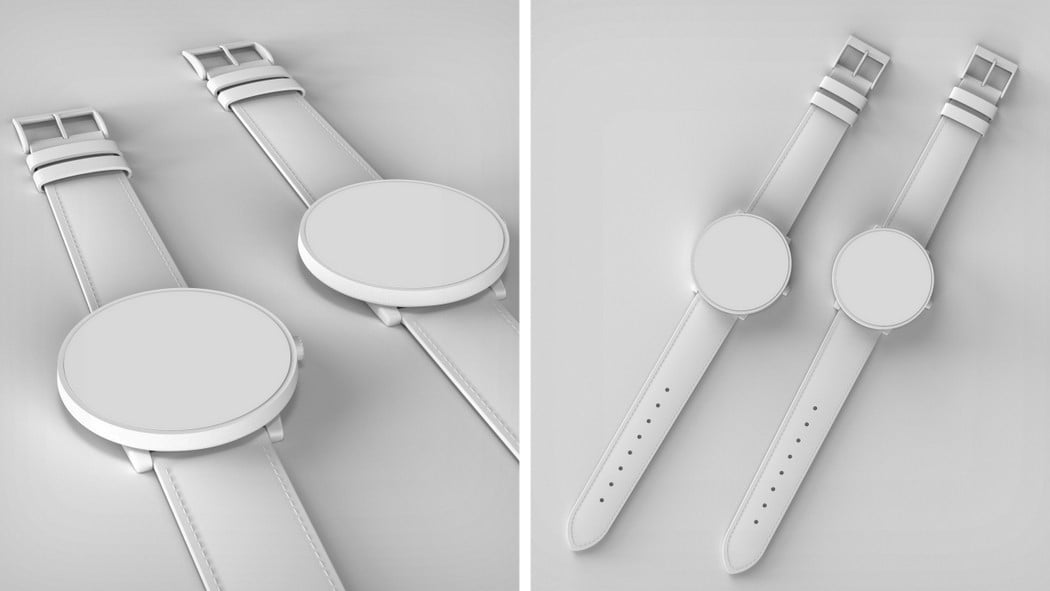
Here you can see the two image layouts I chose to render, before applying the materials.
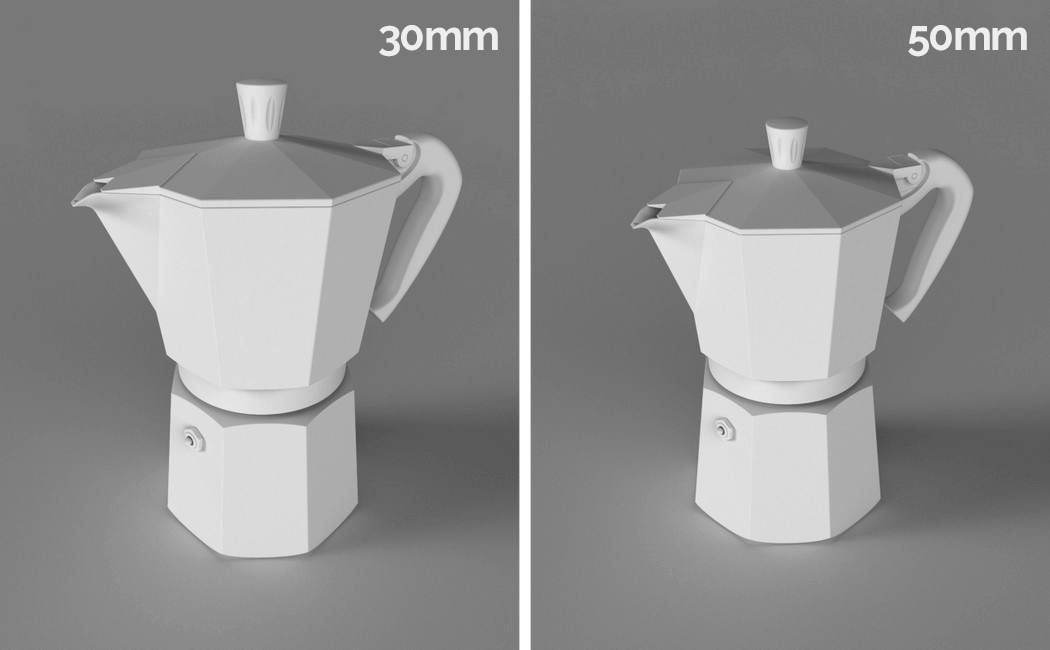
The difference between a 30mm and 50mm lens can be seen here. The 30mm gives this coffee pot a strange perspective, whereas the 50mm is a lot more natural.
THE MORE ACCURATE THE MATERIALS AND LIGHTING, THE BETTER THE RENDER
With the scene set, it’s time to apply the materials. Keyshot’s material graph has become incredibly powerful recently. It’s possible to fine tune each material to have an exact base colour, reflection, translucency, opacity, and much more. Adding in these complex material nodes increases the render time so, while you’re still fine-tuning your scene, I would recommend keeping things simple with just the base materials (and possibly reflection maps to check the highlights aren’t blown out).
Once the base materials are set, it’s time to light the scene. Deciding on the lighting setup really depends on the style of image that you’re aiming for. A soft white light in a studio environment or a sharp warm 2700k temperature light simulating a sunrise with crisp shadows can really change how the scene looks, so remember to replicate real photography if you’re going for realism. I’d recommend learning the basics, like colour temperature and 3-point lighting as a starting point, and then you can really start to have fun!
IMPERFECTIONS MAKE IMAGES FEEL MORE NATURAL
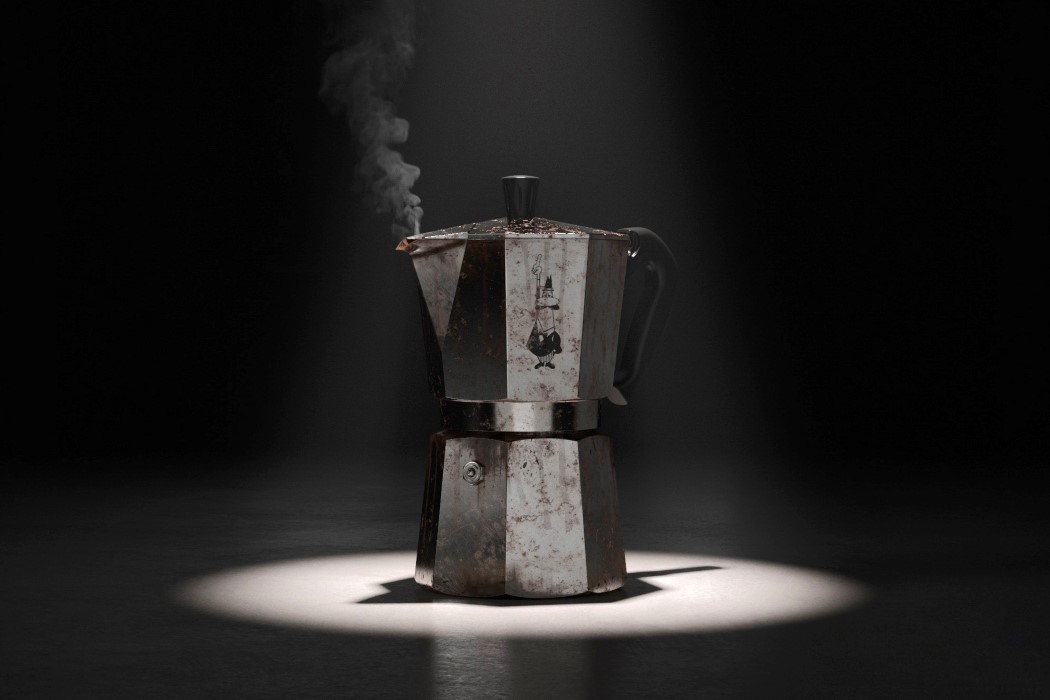
The final push for realism comes from disrupting the perfect geometry that only computers can create; nothing in the real word has a mathematically perfect straight line. This is where rendering is different from product photography, even though the end goal is the same. Photographing products in the real world involves post-production editing in which all of the imperfections are airbrushed out to produce an “ideal reality”. Renderings come from the opposite direction; starting with perfect geometry and applying precise surface imperfections to make it look realistic. The end goal for both is to hit the ideal reality target, without falling into the uncanny valley, which would make the product look like an eerie airbrushed painting.
Adding displacement maps, refraction maps, specular maps etc. are great ways of adding these surface imperfections. Combining these textures, along with the three golden photography rules, will help create realistic images could one day be on the front of a magazine. Now the only thing left to decide is; would you like to advertise cars or milk?
For more tips and tricks, don’t forget to check out the @sam_does_design Instagram and Youtube pages, and www.samdoes.design


ABOUT THE AUTHOR
Sam Gwilt is an industrial designer with an eclectic mix of skills. He graduated Brunel University London and worked for Paul Cocksedge Studio, specializing in bespoke lighting installations and exhibitions internationally. He now works with clients globally at consultancy Precipice Design, and also runs an Instagram Page and YouTube channel – Sam_Does_Design – where he shares industry tips with the community.