Last year, a global survey crowned KeyShot as the “Best Rendering Software,” with 88% of designers overwhelmingly picking it for its incredibly photorealistic rendering capabilities. Now, with KeyShot’s newly unveiled Physics Simulation and Camera Keyframe features, the software is growing even more powerful, bringing real-world physics and camera effects to make your renders pop even more.
Click Here to Participate in the 2024 KeyShot Animation Challenge. Hurry! Challenge ends March 10th, 2024.

I put KeyShot’s Physics Simulation feature to the ultimate test by rendering a dramatic domino chain reaction scene. Setting up the simulation took hardly any time, with incredibly easy controls that took mere minutes to get the hang of. The results were jaw-dropping if I say so myself. In this article, I’ll show you how I managed to pull off one of my most exciting KeyShot rendering experiences ever. I’ll walk you through how I set the domino scene up, what parameters I input into the Physics Simulation window, and how you can recreate this scene, too. I’ll also share tips and tricks that can help you create some incredibly real simulations with objects falling, bouncing, and colliding with each other, absolutely enhancing your KeyShot rendering experience to a level like never before.
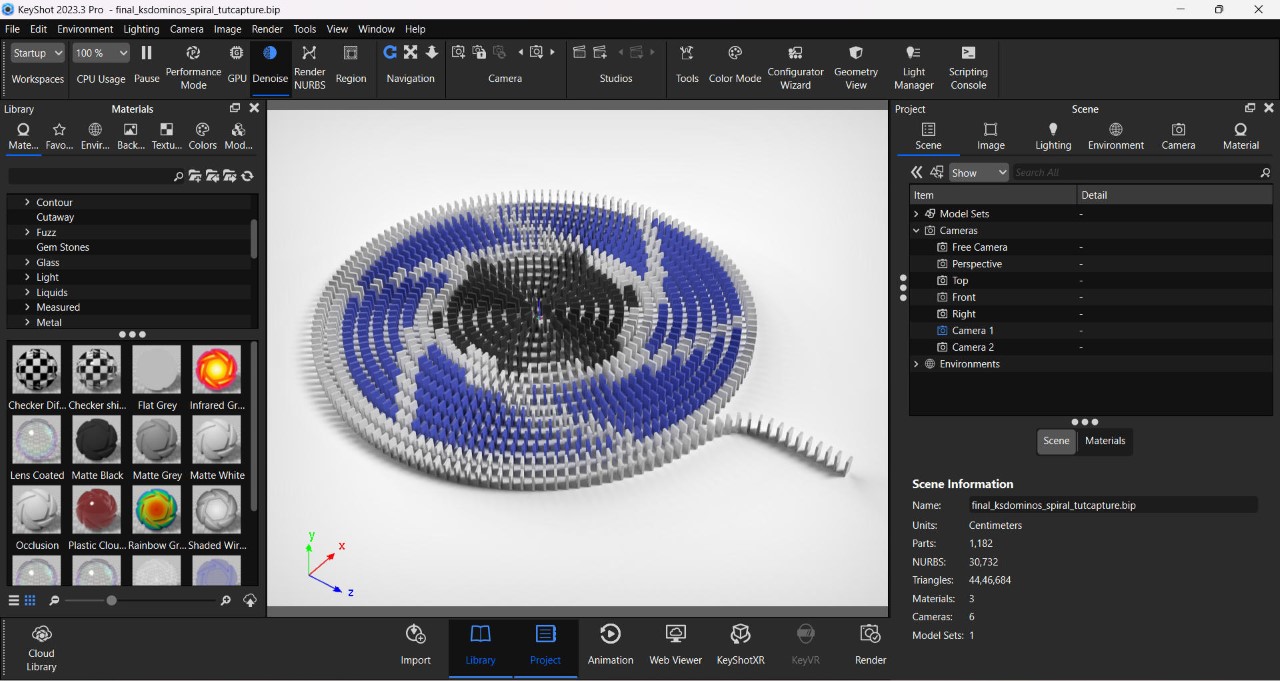
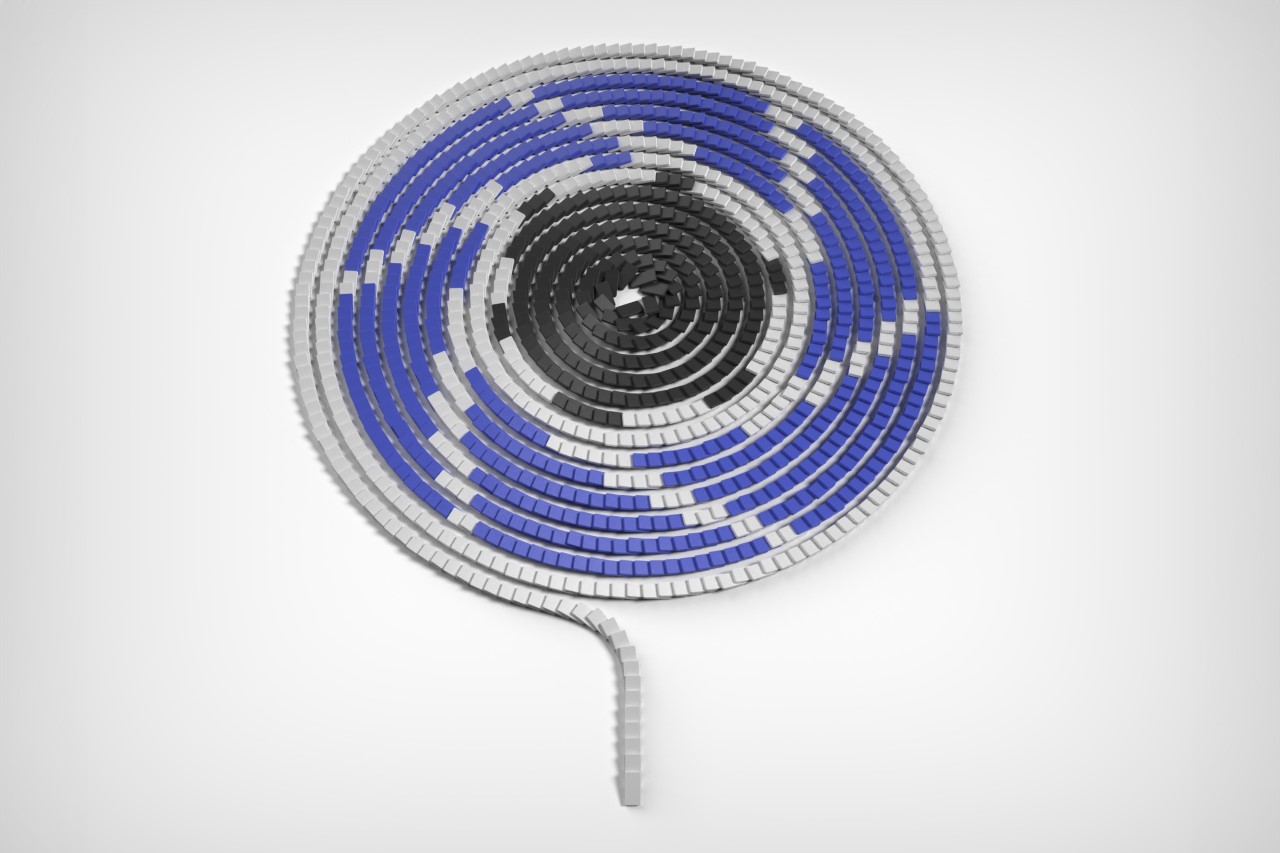
The entire scene was modeled in Rhino 7, starting by building one single domino, creating a spiral curve, and arraying multiple dominoes along the curve. The dominos were spaced at roughly 2 centimeters apart, ensuring the chain reaction would go smoothly from start to finish. The entire scene has a whopping 1182 dominoes in total; a little ambitious considering I was going to render the simulation on a 2022 gaming laptop.
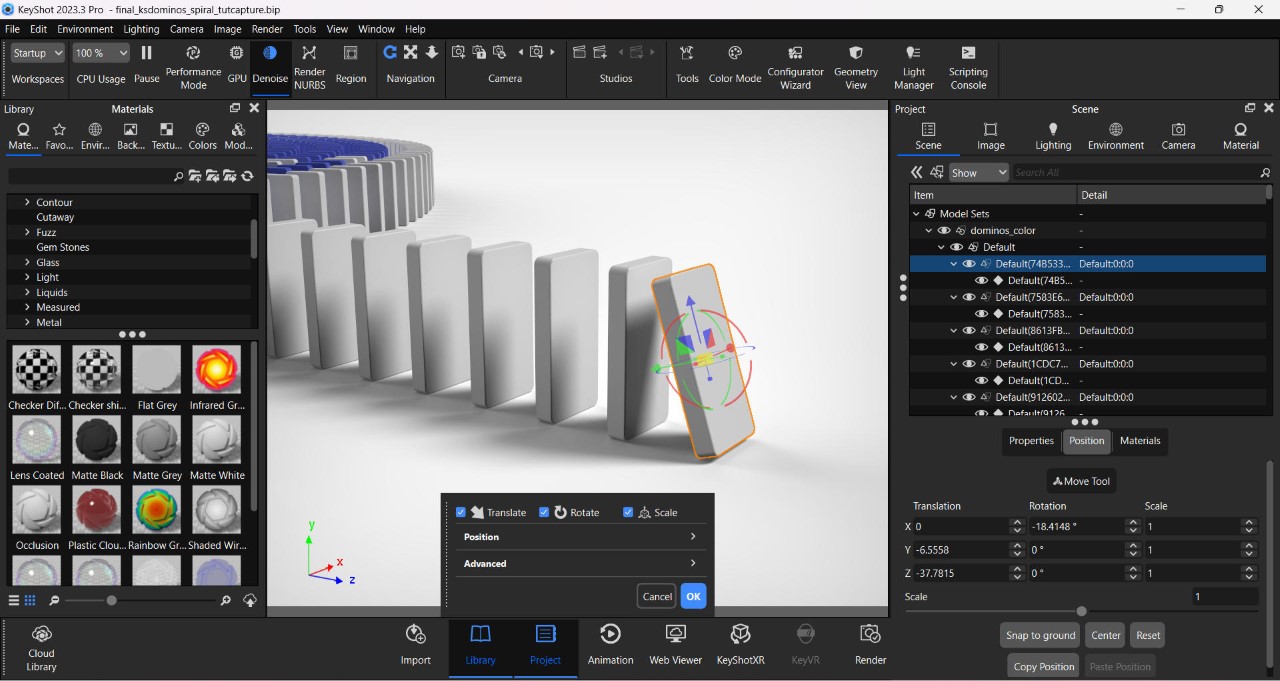
Tilt the first domino to help kickstart the physics cycle
To use the simulation feature, import your scene into the latest version of KeyShot (2023-24) (get a free trial here), set the scale, add the materials, and pick the right environment. Before you use the physics feature, however, you need to prime your scene – in this case, it meant tilting the first domino forward so gravity would kick in during the simulation. The Physics Simulation feature can be found in the ‘Tools’ section on top. Clicking on it opens a separate window with a preview viewport, a bunch of settings, and an animation timeline on the bottom.
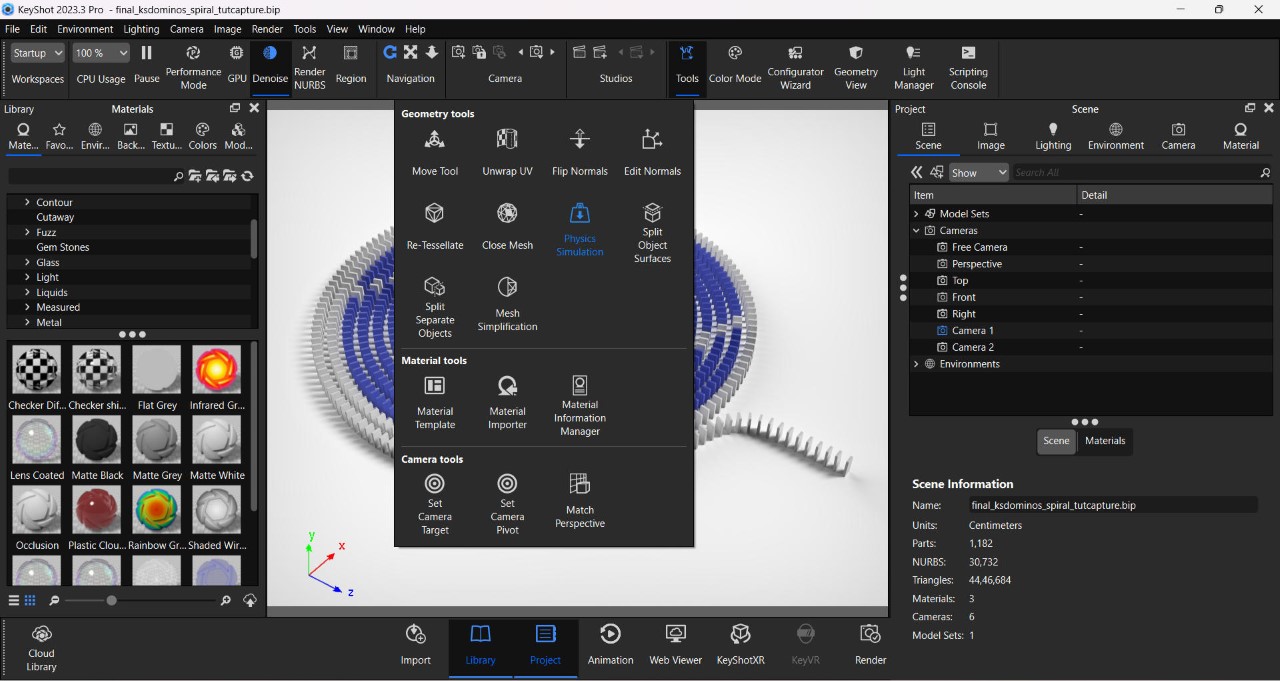
The Physics Simulation feature can be found in the Tools window
To begin with, pick the parts you want to apply physics to (these are the parts that will be influenced by gravity, so don’t pick stuff that remains stationary, like ground objects). The parts you don’t select will still influence your physics because moving objects will still collide with them. Once you’ve chosen what parts you want to move (aka the dominoes), select the ‘Shaded’ option so you can see them clearly in the viewport.
The settings on the left are rather basic but extremely powerful. You start by first setting the maximum simulation time (short animations require short simulations; considering mine was a long chain reaction, I chose 200 seconds), followed by Keyframes Per Second – This basically tells KeyShot to make your animation more detailed or choppy (think FPS, but for simulation). I prefer selecting 25 keyframes per second since I’m rendering my animation at 25fps (just to keep the simulation light), but you can bump things up to 60 keyframes per second, which gives your simulation smoother detail. You can then bump up your animation FPS to render high frame-rate videos that can then be slowed down for dramatic slow motion. Simulation quality dictates how well KeyShot factors the physics in – it’s at a default of 0.1, although if you feel like your simulation looks off, bump it up to a higher value.
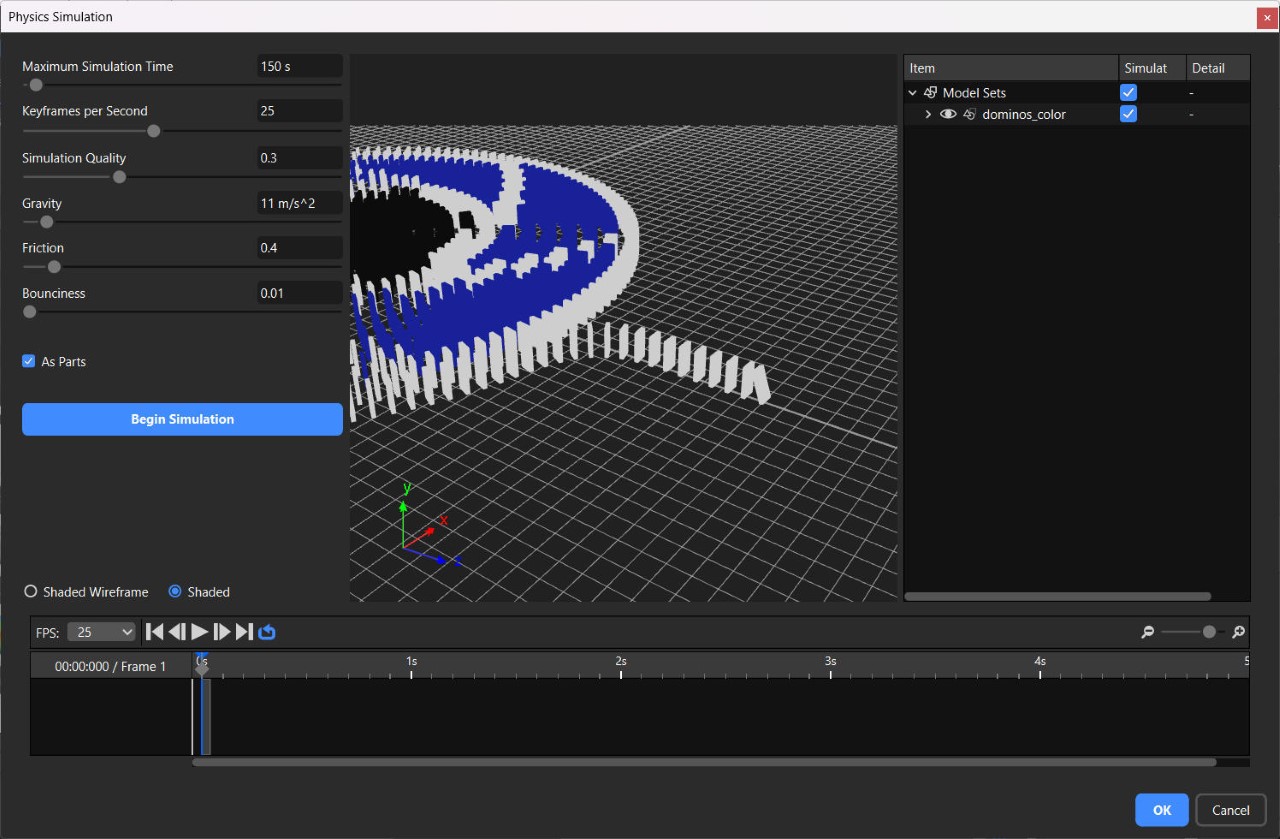
The Physics Simulation Window
The remaining settings pertain to gravity and material properties. The gravity is set at Earth’s default of 9.81 m/s² – increasing it makes items heavier (and fall faster), and decreasing it makes objects float around for longer before descending. I set mine at 11 m/s² just to make sure the dominoes fall confidently. Friction determines the amount of drag caused by two colliding objects – setting a higher friction causes more surface interference, like dropping a cube on a ramp made of rubber, and reducing the friction enables smooth sliding, like the same cube on a polished metal ramp. To ensure that the dominos don’t stick to each other like they were made of rubber, I reduced my friction setting to 0.4. Finally, a Bounciness feature lets you determine how two objects collide – the lower this setting, the less bounce-back, the higher the setting, the more the rebound. Given that I didn’t want my dominos bouncing off each other, I set this at a low of 0.01. Once you’re done, hit the Begin Simulation button to watch the magic unfold.
If you aren’t happy with your simulation, you can stop it mid-way and troubleshoot. Usually, tinkering with the settings helps achieve the right simulation, but here’s something I learned, too – bigger objects fall slower than smaller objects, so playing around with the size and scale of your model can really affect the simulation. If, however, you’re happy with your simulation (you can run through it in the video timeline below), just hit the blue ‘OK’ button, and you’ve successfully rendered your first physics simulation!
The simulation then becomes a part of KeyShot’s Animation timeline, and you can then play around with camera angles and movements to capture your entire scene just the way you visualized it. I created multiple clips of my incredibly long domino chain reaction (in small manageable chunks because my laptop crashed at least 8 times during this) and stitched them together in a video editing app.
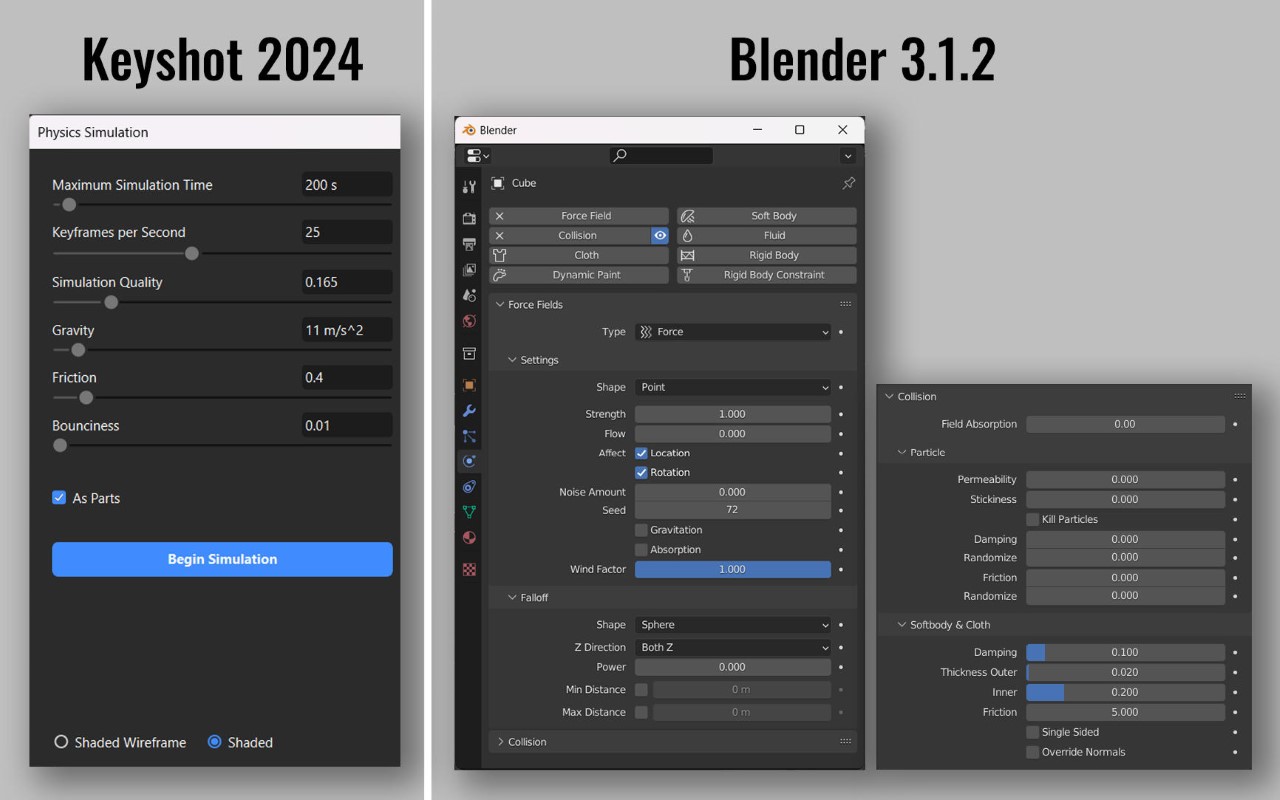
Comparing KeyShot and Blender’s Physics Control Panels
The Physics Simulation feature in KeyShot 2023-24 is incredibly impressive. For starters, it’s a LOT easier than other software like Blender, which can feel a little daunting with the hundreds of settings it has you choose from. Figuring out physics simulation in KeyShot takes just a few minutes (although the actual simulation can take a while if you’re running something complex), making an already powerful rendering software feel even more limitless!
That being said, there’s some room for growth. Previous experiments with the simulation tool saw some strange results – falling objects sometimes ended up choosing their own direction, making the simulation feel odd (I made a watch fall down and the entire thing disassembled and scattered in mid-air instead of falling together and breaking apart on impact). Secondly, sometimes objects can go through each other instead of colliding, so make sure you tinker with quality settings to get the perfect result. Thirdly, you can’t choose different bounciness values for different objects in the same simulation just yet, although I’m sure KeyShot is working on it. Finally, it would be absolutely amazing if there were a ‘slow-motion’ feature. The current way to do this is to bump up the keyframe rate and bring down the gravity, but that can sometimes cause objects to drift away after colliding instead of falling downwards in slow motion.
So there you have it! You can use this tutorial to animate your own domino sequence, too, or better still, create a new simulation based on your own ideas! If you do, make sure to participate in the 2024 KeyShot Animation Challenge to stand a chance to win some exciting prizes. Hurry! The competition ends on March 10th, 2024!